快捷方式

概述

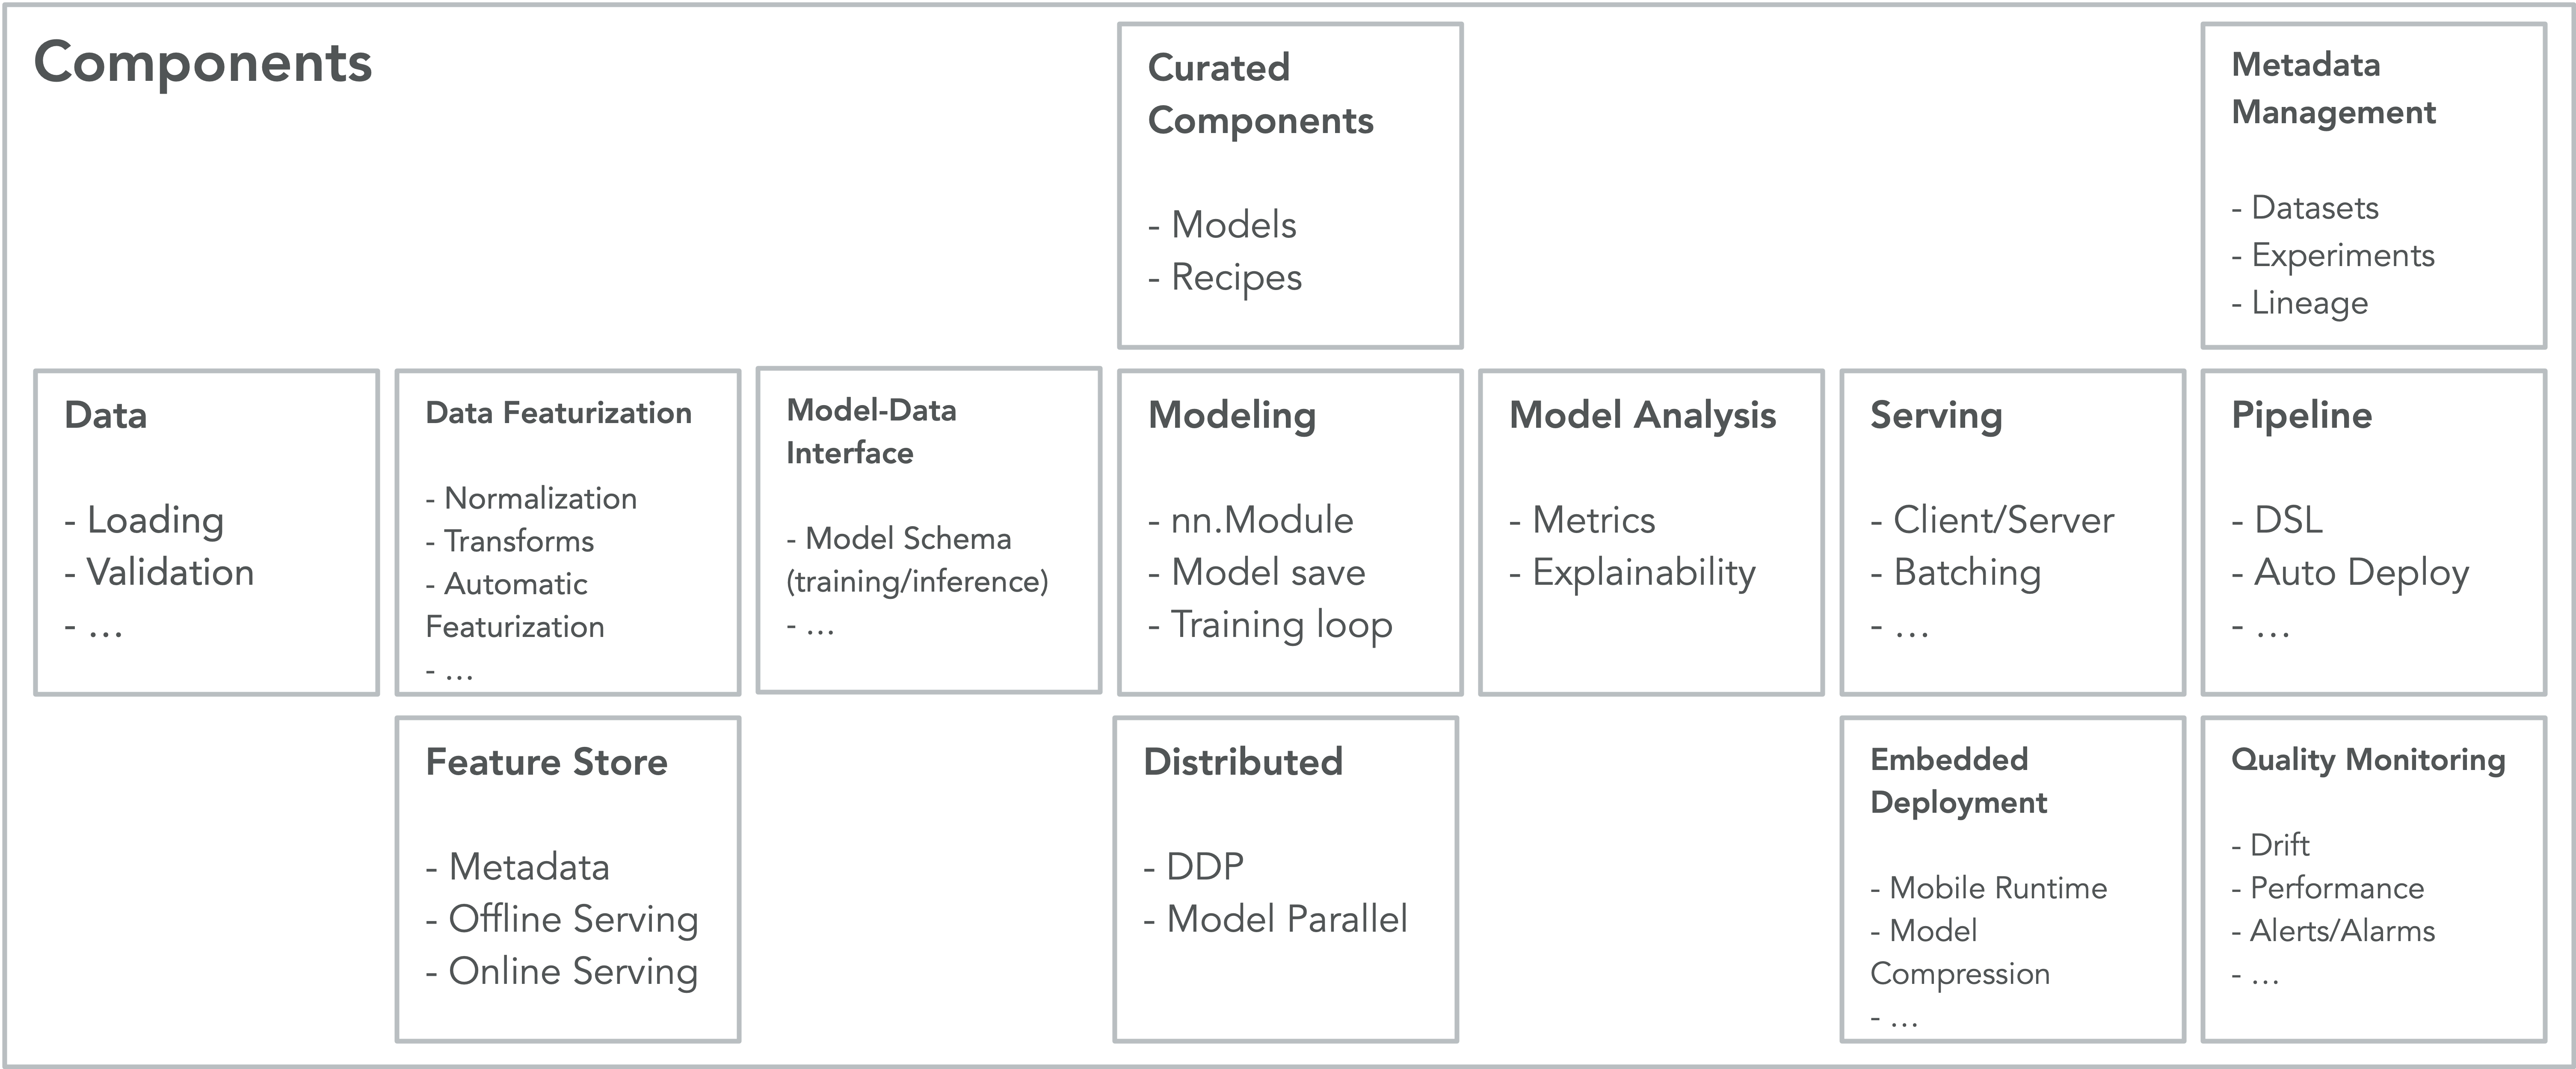
../_images/components_diagram.jpg

注意

上图仅用于说明目的。并非所有框当前都开箱即用。

此模块包含一系列内置 TorchX 组件。目录结构按组件类别组织。组件只是模板化的应用程序规范。可以将其视为不同类型作业定义的工厂方法。在此模块中返回 specs.AppDef 的函数是我们所说的组件。

您可以在 torchx.components 模块或我们的 文档页面 上浏览组件库。

使用内置组件

找到内置组件后,您可以:

  1. 将组件作为作业运行

  2. 在工作流(管道)的上下文中使用组件

在这两种情况下,组件都将作为作业运行,区别在于作业将直接在调度程序上作为独立作业运行,或作为具有上游和/或下游依赖项的工作流中的一个“阶段”。

注意

根据组件的语义,作业可以是单节点的或分布式的。例如,如果组件具有单个角色,其中 role.num_replicas == 1,那么作业就是单节点作业。如果组件具有多个角色,或者如果任何角色的 num_replicas > 1,那么作业就是多节点分布式作业。

不确定是否应该将组件作为作业或管道阶段运行?使用此经验法则:

  1. 刚开始?通过将其作为作业运行来熟悉组件

  2. 需要作业依赖项?将组件作为管道阶段运行

  3. 不需要作业依赖项?将组件作为作业运行

编写

由于组件只是一个返回 specs.AppDef 的 Python 函数,因此编写您自己的组件就像编写一个具有以下规则的 Python 函数一样简单:

  1. 组件函数必须返回 specs.AppDef,并且必须指定返回类型

  2. 组件的所有参数必须使用 PEP 484 类型注释,并且类型必须是以下之一:
    1. 基本类型:intfloatstrbool

    2. 可选基本类型:Optional[int]Optional[float]Optional[str]

    3. 基本类型映射:Dict[Primitive_key, Primitive_value]

    4. 基本类型列表:List[Primitive_values]

    5. 可选集合:Optional[List]Optional[Dict]

    6. VAR_ARG:*arg(在将参数传递给入口点脚本时很有用)

  3. (可选)google 格式 的文档字符串(特别是请参阅 function_with_pep484_type_annotations)。此文档字符串纯粹是信息性的,因为 torchx cli 使用它来自动生成信息性的 --help 消息,这在与他人共享组件时很有用。如果组件没有文档字符串,--help 选项仍然有效,但参数将具有预定义的描述(见下文)。请注意,当通过 torchx.runner 以编程方式运行组件时,torchx 根本不会拾取文档字符串。

以下是一个启动 DDP 脚本的示例组件,它是 torchx.components.dist.ddp() 内置组件的简化版本。

import os
import torchx.specs as specs

def ddp(
    *script_args: str,
    image: str,
    script: str,
    host: str = "aws_p3.2xlarge",
    nnodes: int = 1,
    nproc_per_node: int = 1,
) -> specs.AppDef:
   return specs.AppDef(
       name=os.path.basename(script),
       roles=[
           spec.Role(
               name="trainer",
               image=image,
               resource=specs.named_resources[host],
               num_replicas=nnodes,
               entrypoint="python",
               args=[
                   "-m",
                   "torch.distributed.run",
                   "--rdzv_backend=c10d",
                   "--rdzv_endpoint=localhost:5900",
                   f"--nnodes={nnodes}",
                   f"--nprocs_per_node={nprocs_per_node}",
                   "-m",
                   script,
                   *script_args,
               ],
           ),
       ]
   )

假设上面的组件保存在 example.py 中,我们可以对其运行 --help,如下所示:

$ torchx ./example.py:ddp --help
usage: torchx run ...torchx_params... ddp  [-h] --image IMAGE --script SCRIPT [--host HOST]
                                          [--nnodes NNODES] [--nproc_per_node NPROC_PER_NODE]
                                          ...

AppDef: ddp. TIP: improve this help string by adding a docstring ...<omitted for brevity>...

positional arguments:
  script_args           (required)

optional arguments:
  -h, --help            show this help message and exit
  --image IMAGE         (required)
  --script SCRIPT       (required)
  --host HOST           (default: aws_p3.2xlarge)
  --nnodes NNODES       (default: 1)
  --nproc_per_node NPROC_PER_NODE
                        (default: 1)

如果我们包含一个文档字符串,如下所示:

def ddp(...) -> specs.AppDef:
  """
  DDP Simplified.

  Args:
     image: name of the docker image containing the script + deps
     script: path of the script in the image
     script_args: arguments to the script
     host: machine type (one from named resources)
     nnodes: number of nodes to launch
     nproc_per_node: number of scripts to launch per node

  """

  # ... component body same as above ...
  pass

那么 --help 消息将反映文档字符串中的函数和参数描述,如下所示:

usage: torchx run ...torchx_params... ddp  [-h] --image IMAGE --script SCRIPT [--host HOST]
                                          [--nnodes NNODES] [--nproc_per_node NPROC_PER_NODE]
                                          ...

App spec: DDP simplified.

positional arguments:
  script_args           arguments to the script

optional arguments:
  -h, --help            show this help message and exit
  --image IMAGE         name of the docker image containing the script + deps
  --script SCRIPT       path of the script in the image
  --host HOST           machine type (one from named resources)
  --nnodes NNODES       number of nodes to launch
  --nproc_per_node NPROC_PER_NODE
                        number of scripts to launch per node

验证

要验证是否已正确定义组件,您可以:

  1. (最简单的方法)使用 cli 对组件的 --help 进行试运行:torchx run --dryrun ~/component.py:train --help

  2. 使用组件 linter(请参阅 dist_test.py 作为示例)

作为作业运行

您可以使用 torchx cli 或以编程方式使用 torchx.runner 将组件作为作业运行。两者都是相同的,实际上 cli 在幕后使用了 runner,因此您可以根据自己的喜好进行选择。快速入门 指南将引导您完成入门的基本步骤。

以编程方式运行

要以编程方式运行内置组件或您自己的组件,只需将组件作为常规 Python 函数调用,并将其传递给 torchx.runner。以下是如何调用 utils.echo 内置组件的示例:

from torchx.components.utils import echo
from torchx.runner import get_runner

get_runner().run(echo(msg="hello world"), scheduler="local_cwd")

CLI 运行(内置组件)

从命令行运行组件时,您需要传递要调用的组件函数。对于内置组件,其形式为 {component_module}.{component_fn},其中 {component_module} 是相对于 torchx.components 的组件模块路径,而 {component_fn} 是该模块中的组件函数。因此对于 torchx.components.utils.echo,我们将删除 torchx.components 前缀,并将其运行为

$ torchx run utils.echo --msg "hello world"

有关更多信息,请参见 CLI 文档

CLI 运行(自定义)

要使用 CLI 运行自定义组件,您需要使用略微不同的语法 {component_path}:{component_fn}。其中 {component_path} 是组件 Python 文件的文件路径,而 {component_fn} 是该文件中的组件函数名称。假设您的组件位于 /home/bob/component.py 中,并且组件函数名为 train(),则您将按以下方式运行它:

# option 1. use absolute path
$ torchx run /home/bob/component.py:train --help

# option 2. let the shell do the expansion
$ torchx run ~/component.py:train --help

# option 3. same but after CWD to $HOME
$ cd ~/
$ torchx run ./component.py:train --help

# option 4. files can be relative to CWD
$ cd ~/
$ torchx run component.py:train --help

注意

如果您知道 TorchX 的安装目录,则内置组件也可以以这种方式运行!

从 CLI 传递组件参数

由于组件只是 Python 函数,因此以编程方式使用它们非常简单。如上所述,在通过 CLI 的 run 子命令运行组件时,组件参数将作为程序参数使用双破折号 + 参数名称语法传递(例如 --param1=1--param1 1)。CLI 会根据组件的文档字符串自动生成 argparse 解析器。以下是关于如何传递各种类型组件参数的摘要,假设组件定义如下:

# in comp.py
from typing import Dict, List
import torchx.specs as specs

def f(i: int, f: float, s: str, b: bool, l: List[str], d: Dict[str, str], *args) -> specs.AppDef:
   """
   Example component

   Args:
       i: int param
       f: float param
       s: string param
       b: bool param
       l: list param
       d: map param
       args: varargs param

   Returns: specs.AppDef
   """

   pass
  1. 帮助:torchx run comp.py:f --help

  2. 基本类型 (int, float, str):torchx run comp.py:f --i 1 --f 1.2 --s "bar"

  3. 布尔值:torchx run comp.py:f --b True(或 --b False

  4. 映射:torchx run comp.py:f --d k1=v1,k2=v2,k3=v3

  5. 列表:torchx run comp.py:f --l a,b,c

  6. VAR_ARG:*args 作为位置参数而不是参数传递,因此它们在命令末尾指定。使用 -- 分隔符来开始 VAR_ARGS 部分。当组件和应用程序具有相同的参数或通过 --help 参数传递时,这很有用。以下是一些示例:* *args=["arg1", "arg2", "arg3"]torchx run comp.py:f --i 1 arg1 arg2 arg3 * *args=["--flag", "arg1"]torchx run comp.py:f --i 1 --flag arg1 `` * ``*args=["--help"]: torchx run comp.py:f -- --help * *args=["--i", "2"]: torchx run comp.py:f --i 1 -- --i 2

在管道中运行

torchx.pipelines 定义了适配器,这些适配器将 TorchX 组件转换为表示目标管道平台中管道“阶段”的对象(有关支持的管道编排器的列表,请参见 管道)。

其他资源

请参见

  1. 本模块中定义的组件作为说明性示例

  2. 定义您自己的组件 快速入门指南

  3. 组件最佳实践 指南

  4. 应用程序最佳实践 指南

文档

访问 PyTorch 的综合开发人员文档

查看文档

教程

获取针对初学者和高级开发人员的深入教程

查看教程

资源

查找开发资源并获得问题的解答

查看资源